
Navigation Settings
This is an abridged version of the user guide, highlighting essential features. To access the full version with detailed steps, kindly reach out to your dedicated Account Manager.
1) Navigation Settings
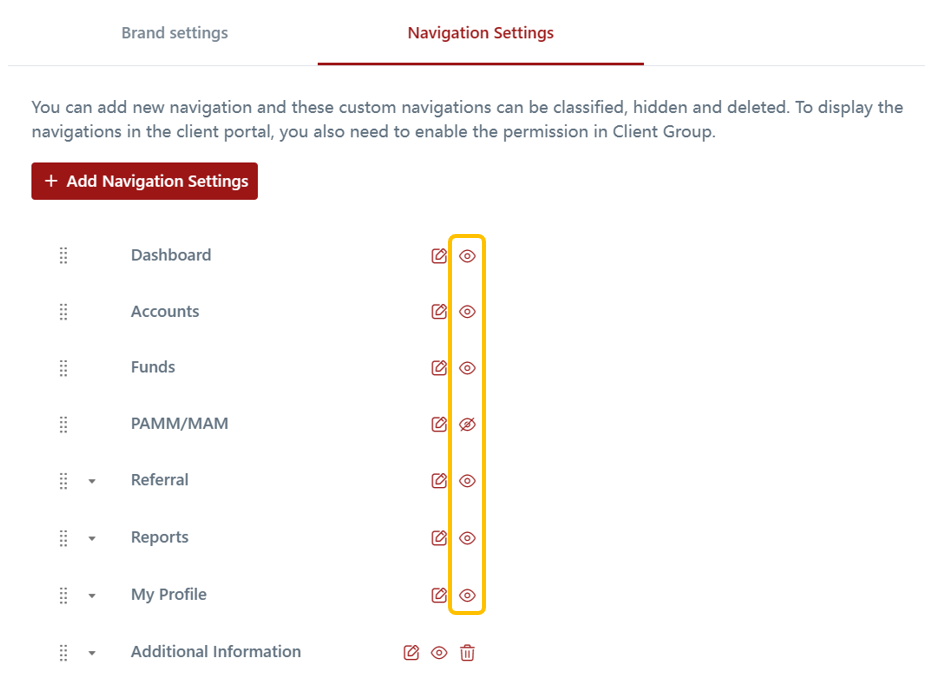
In the Navigation Settings of the CRM, you have the ability to create custom tabs for your clients on the CRM Client Portal. This feature enables you to add additional tabs that are not available by default, providing a more customized experience for your clients.
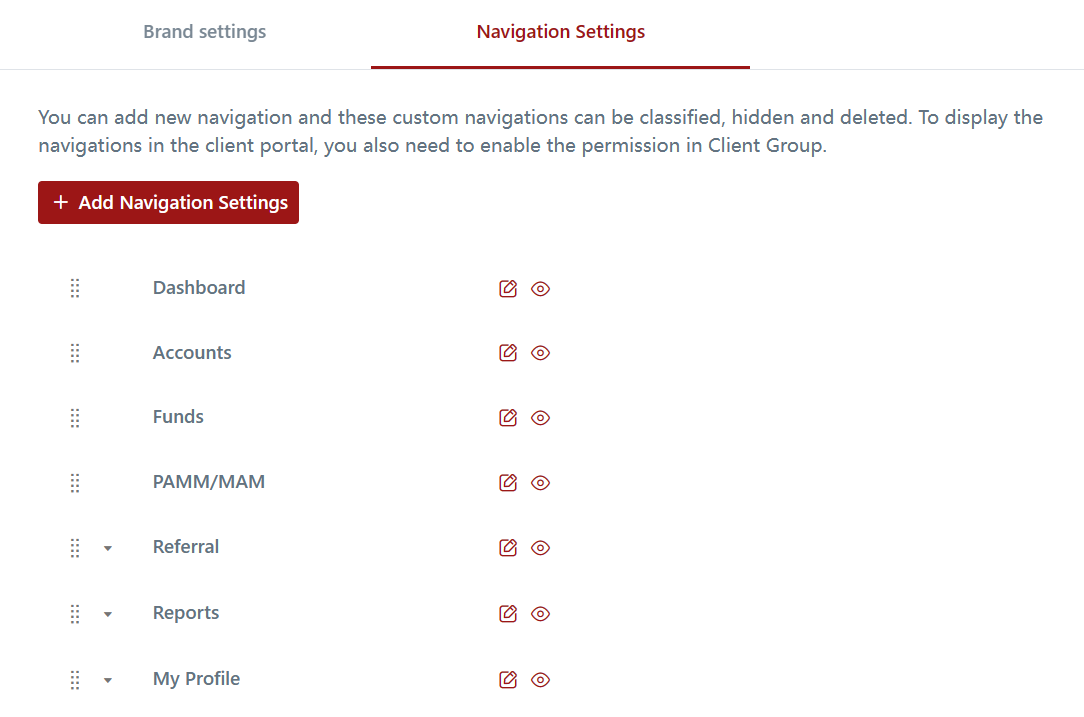
2) Creating Navigation Tabs
There are 2 types of Navigation Tabs that can be created:
Group
Navigation
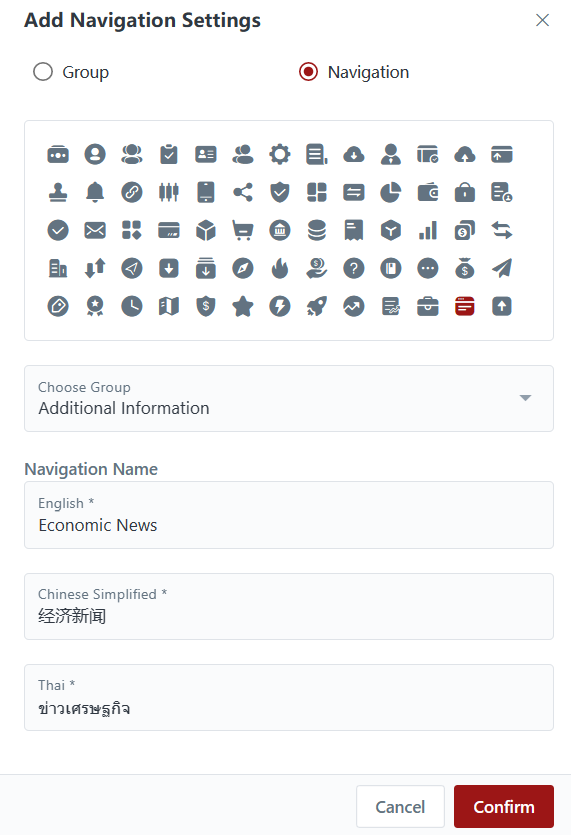
Once you have created the navigation tabs in the CRM Client Portal, you will need to input the content. There are two ways to do this:
Embedding a Link: You can create a tab by embedding a link to external content or webpages. This allows you to direct clients to specific resources, websites, or any relevant content you wish to share. Simply provide the URL or link to the desired content, and it will be accessible to clients through the navigation tab.

Inputting Your Own Content: Alternatively, you can input your own content directly into the custom tab. This gives you the flexibility to create and display personalized content for your clients. You can use this feature to share announcements, guides, educational materials, or any other information you deem valuable. By inputting your own content, you have full control over the information you provide to your clients.
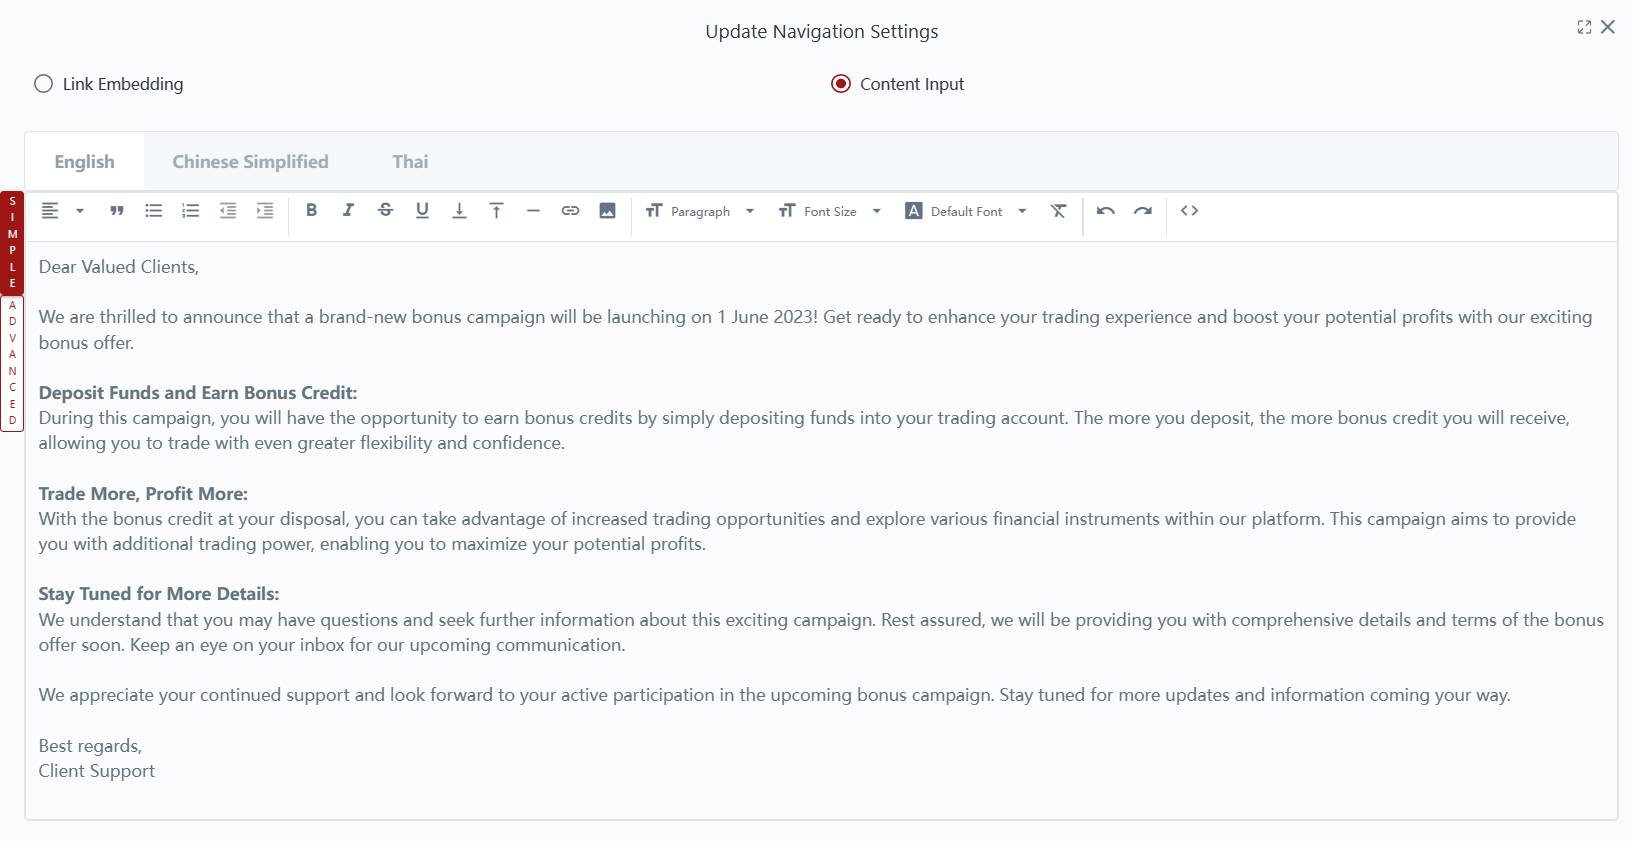
3) Editing Navigation Tabs
You can edit the navigation settings by clicking the "Edit" button.
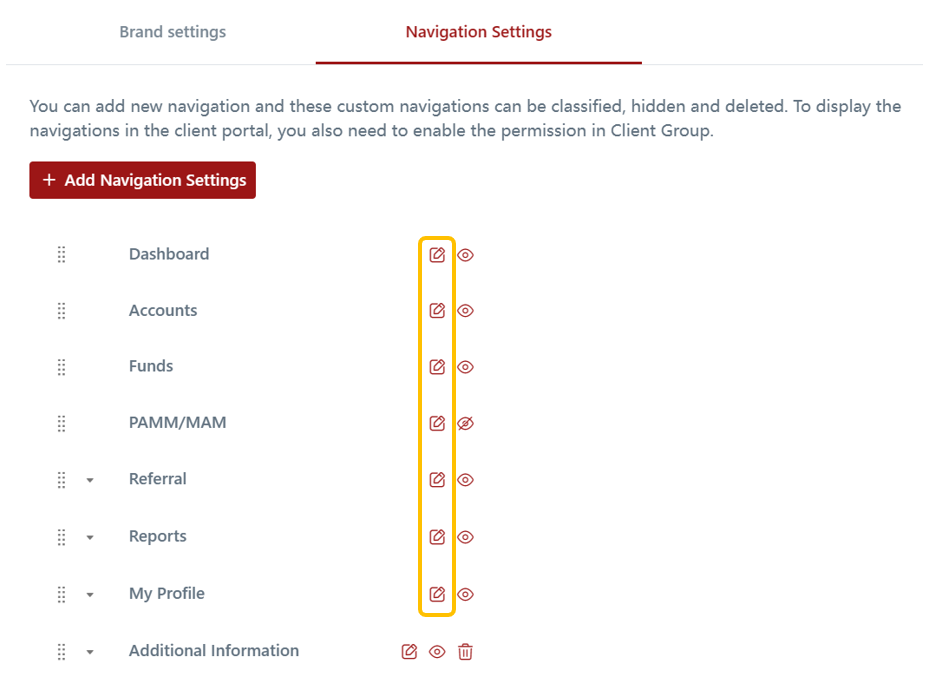
4) Disabling Navigation Tabs
You can also disable navigation tabs that are irrelevant.
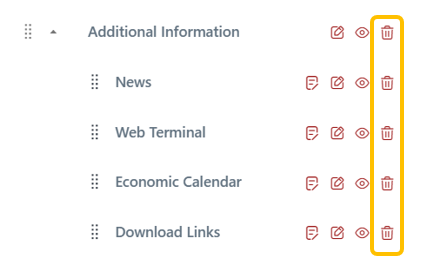
5) Deleting Navigation Tabs
You can delete navigation tabs that are no longer needed.
Last updated