
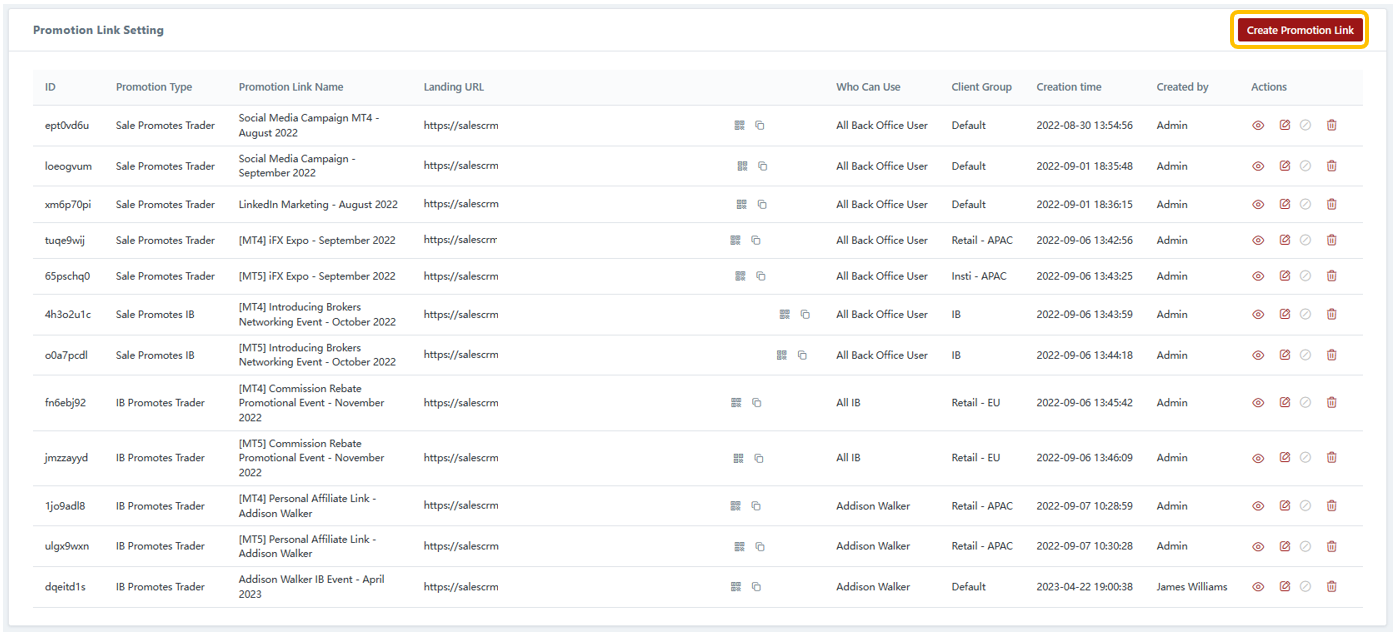
Back Office Portal - Promotional Link Settings
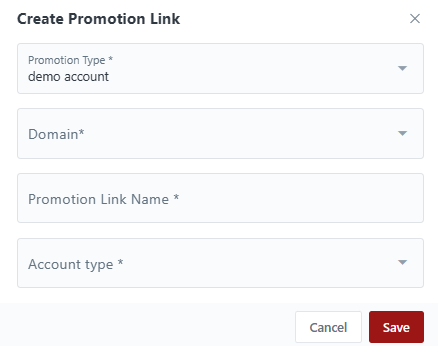
1) Setting Up Promotional Links
2) Demo Account Promotional Links
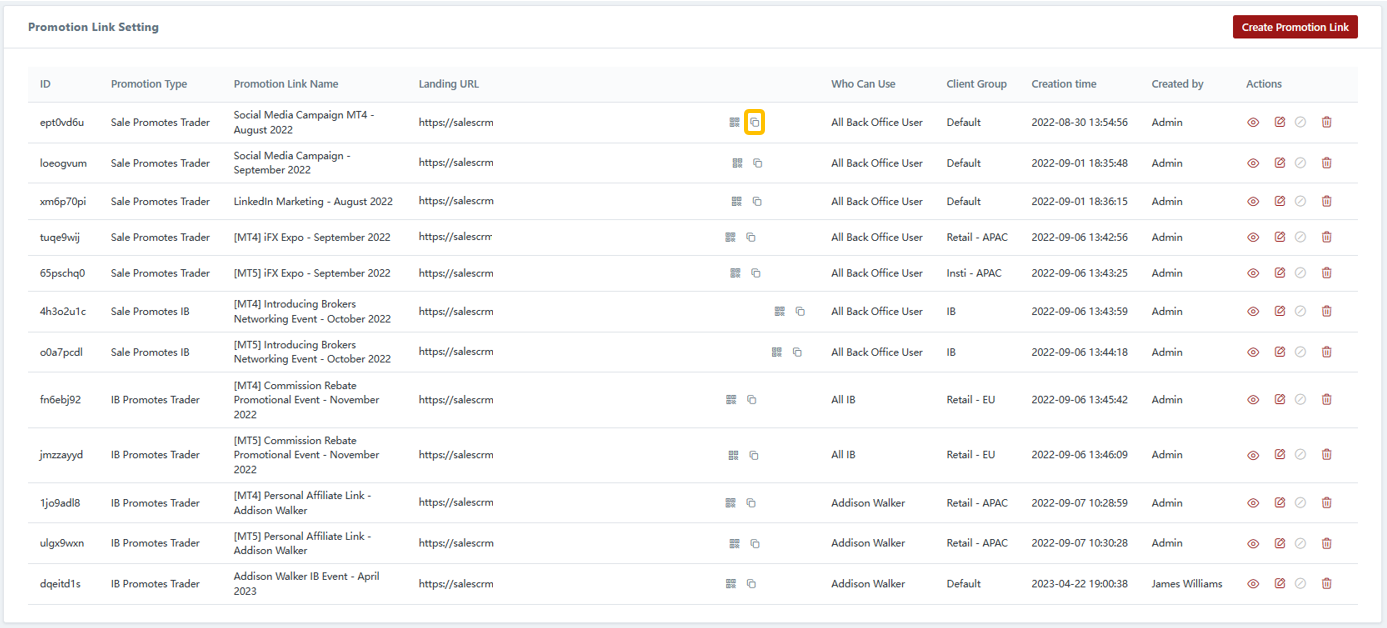
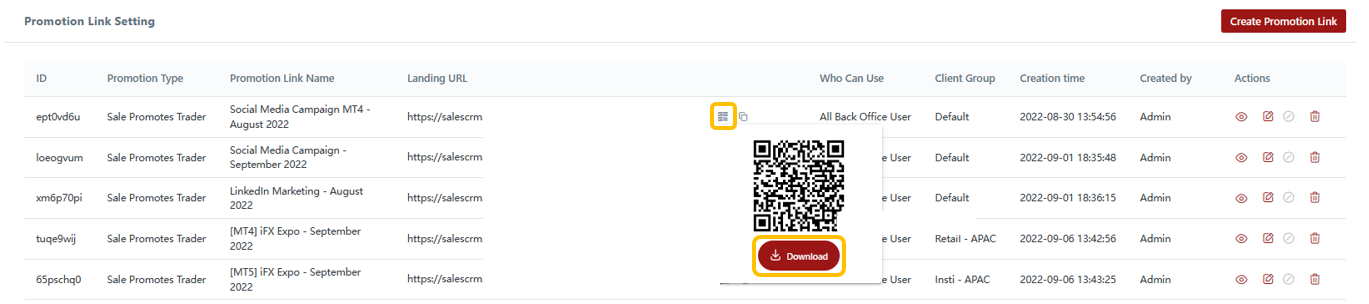
3) Sharing Promotional Links
4) Viewing Performance Analytics of Promotional Links

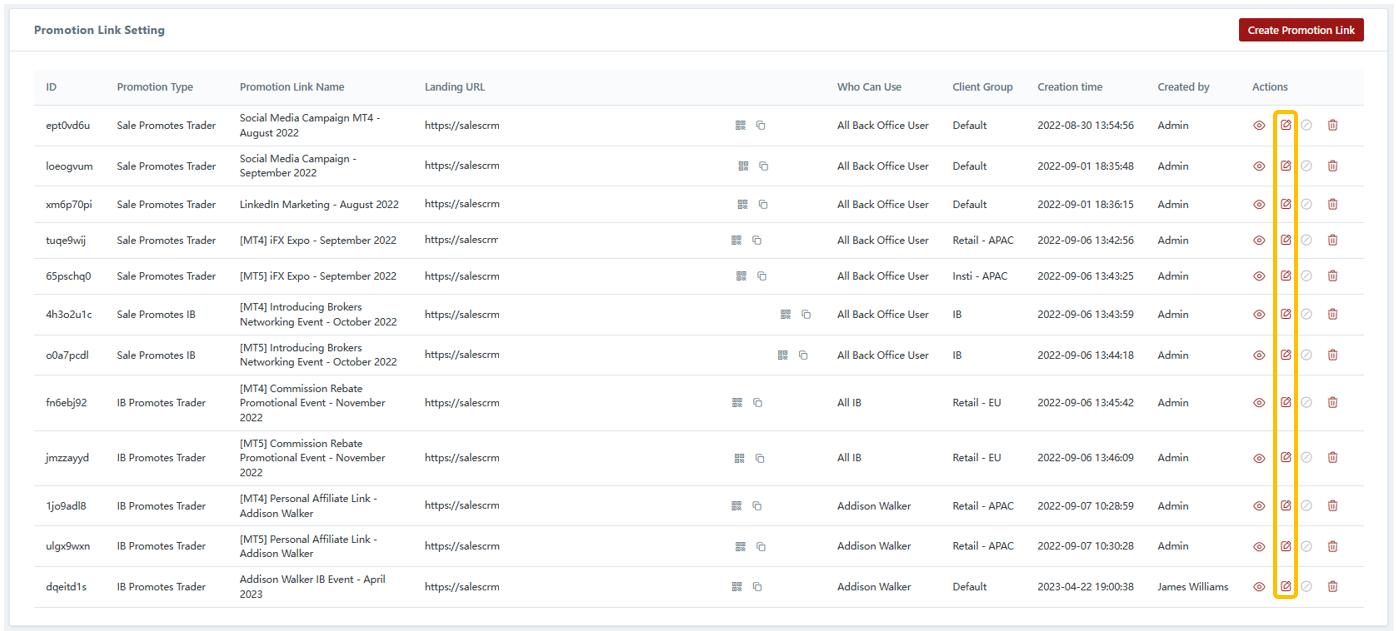
5) Editing Promotional Links
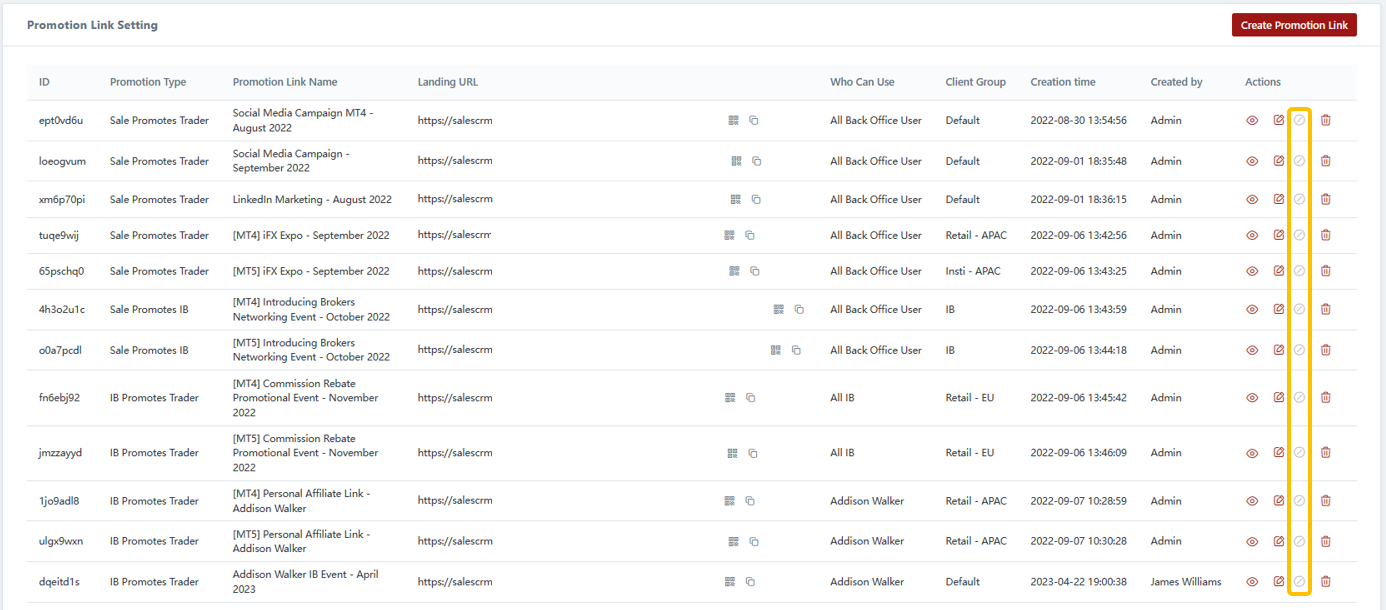
6) Disabling Promotional Links
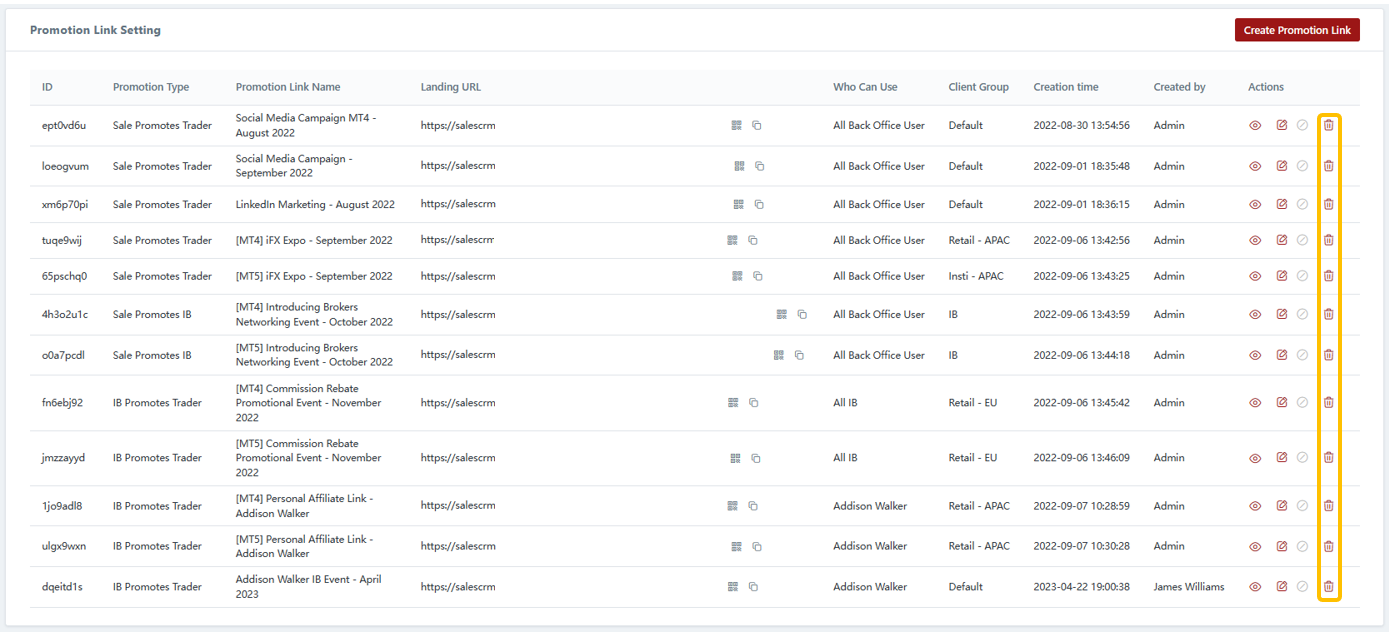
7) Deleting Promotional Links
Last updated