# Client Groups
## 1. Creating Client Groups
To create a client group, follow these steps:
{% tabs %}
{% tab title="Step 1" %}
1. Navigate to Settings > Client Group.
2. Click "Create Group".
{% endtab %}
{% tab title="Step 2" %}
1. Enter the desired name for the client group.
2. Provide a description for this client group.
3. Click on the "Create Group" button to finalize the creation.
{% endtab %}
{% tab title="Step 3" %}
You have the option to designate a default client group by selecting the "Set as Default" feature. This means that any new client registrations will automatically be assigned to this particular client group.
{% endtab %}
{% endtabs %}
## 2. Editing Client Group Permissions
To configure CRM client portal permissions for each client group, follow these steps:
{% tabs %}
{% tab title="Step 1" %}
1. Locate the specific client group for which you wish to set permissions.
2. Click on the "View Permissions" icon, and a list of available permissions will be shown.
{% endtab %}
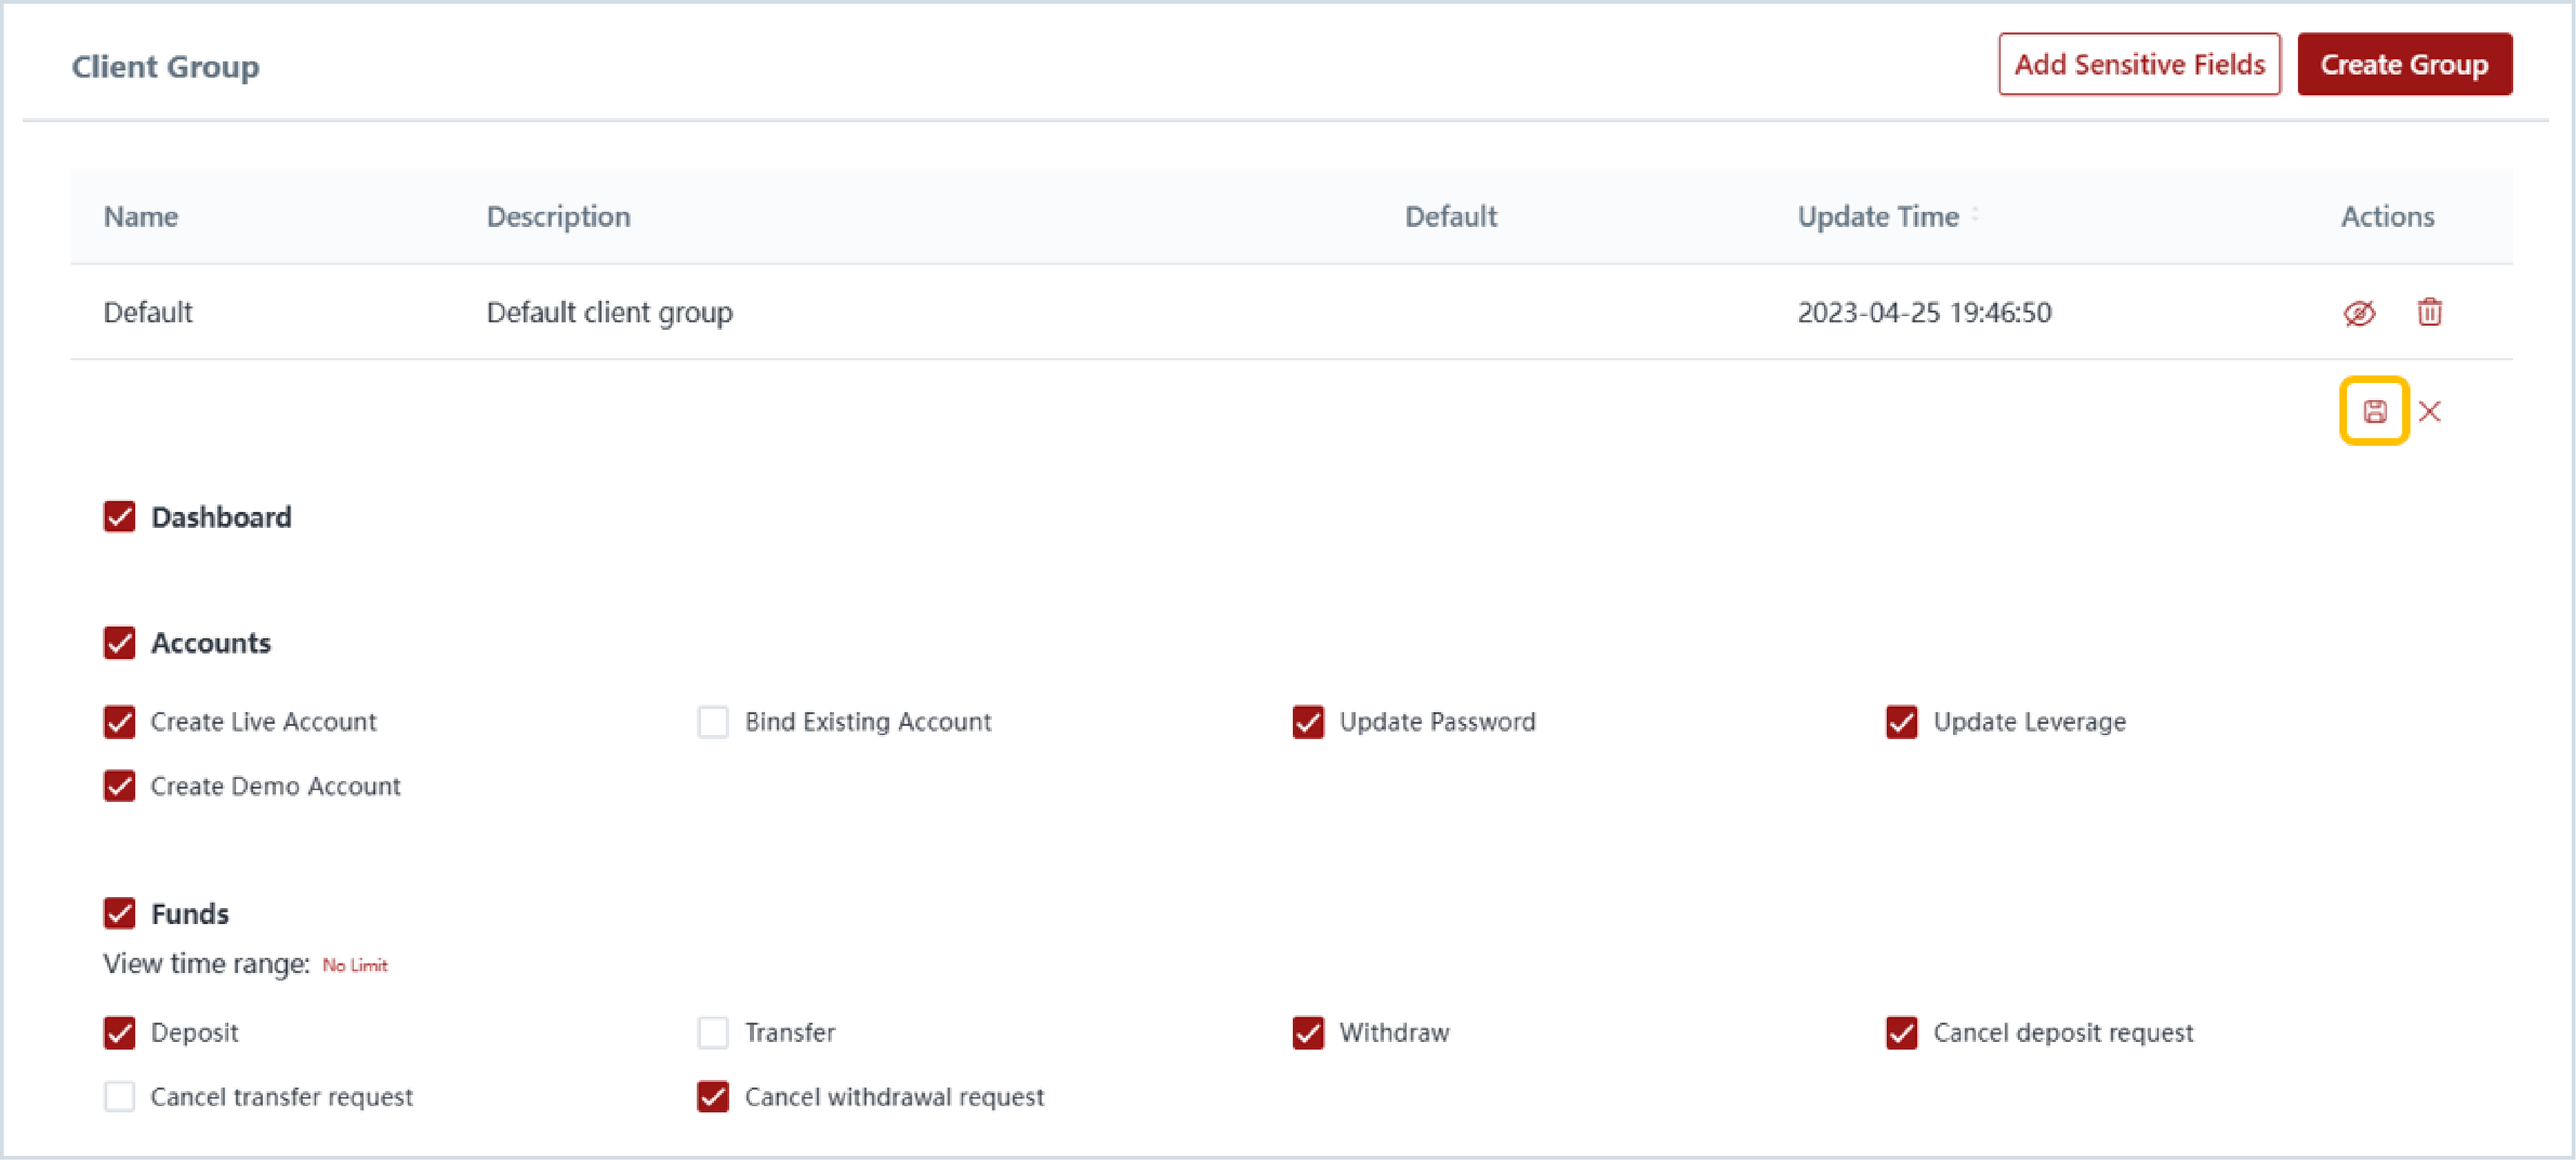
{% tab title="Step 2" %}
1. Click on the "Edit" icon next to the permissions.
2. Select the desired permissions you want to assign to the client group.
3. Finally, click on the "Save" icon to save the changes.
{% endtab %}
{% endtabs %}