# V7.7.0 - Revamped Deposit Interface & Prop Challenge "Direct Purchase" Function
**Released Date - 22 February 2024**
This new release spots a deposit interface overhaul, introducing intuitive icons on a streamlined single page for easy navigation. In addition, your clients can now directly purchase a package to participate in challenges, bypassing the need for an initial e-wallet deposit. These enhancements promise a smoother user experience.
## Summary
1. [New Deposit Interface](#new-deposit-interface)
* **Enhanced Visuals:** Newly introduced visual elements enhances clarity and intuitiveness for users. Clients can now quickly identify their preferred deposit method at a glance.
* **Single Page Navigation**: With the deposit process optimized into a one-page format, clients can now navigate through each step seamlessly. This reduces complexity and ensures that all necessary details are presented cohesively, providing clients a clear overview of their entire deposit action.
2. [Direct Purchase of Prop Packages](#direct-purchase-of-prop-packages)
* **Instant Prop Challenge Participation**: The introduction of a direct purchase function allows for faster and easier challenge access, greatly improving client conversion.
* **Flexible Payment Methods**: Enjoy full autonomy in configuring the permissible payment methods for each challenge package, meeting the diverse preferences of your target audience.
## New Deposit Interface
We're excited to unveil the latest update: a completely overhauled deposit interface. Now with user-friendly icons and a simplified one-page layout, managing your transactions is more seamless than ever.
### 1) Permission Settings
The following permission settings have been added:
1. **Read Payment Gateway Icons** - allows you to view the list of payment gateway icons.
* Existing roles with the "Create Payment Method" and "Update Payment Method" permission selected will automatically have this permission checked.
2. **Update Payment Gateway Icons** - enables you to add, edit, and delete payment gateway icons.
* Existing roles with the "Create Payment Method" and "Update Payment Method" permission selected will automatically have this permission checked.
* When this permission is selected, "Read Payment Gateway Icons" will be checked automatically.
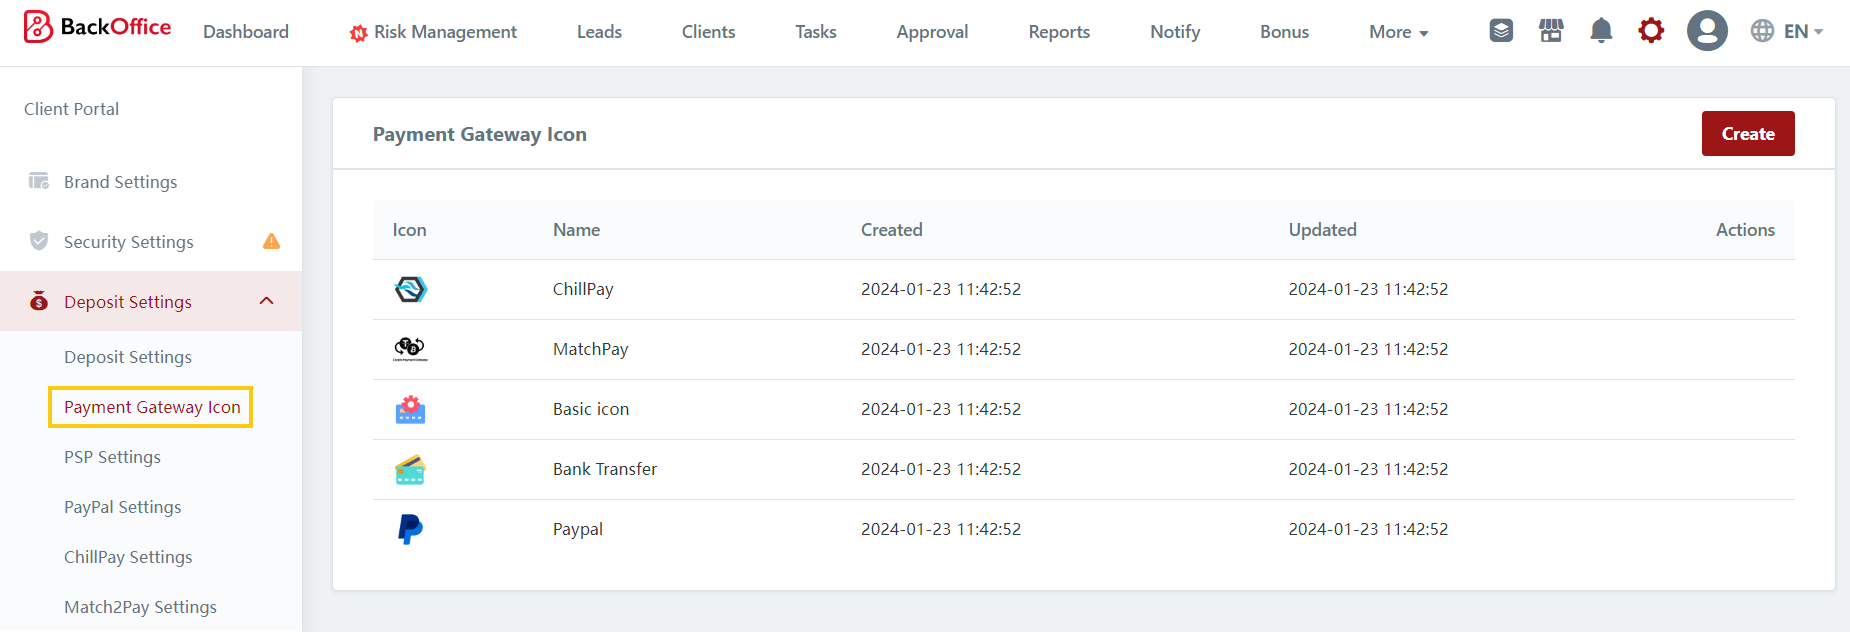
### 2) Payment Gateway Icon
1. We've introduced a new tab: "Payment Gateway Icon" in our deposit settings menu. Here, you can personalize icons for different payment gateways/methods.
2. Default icons have been pre-set for the following payment methods:
* ChillPay
* Match2pay
* Basic Icon
* Bank Transfer
* PayPal
3. Please note that these default icons are fixed and cannot be edited or deleted.
### 3) Adding Payment Gateway Icons
To add a payment gateway icon, please follow these steps:
{% tabs %}
{% tab title="Step 1" %}
1. Click on the "Create" button.
{% endtab %}
{% tab title="Step 2" %}
1. Enter the name of the payment gateway icon.
2. Upload a copy of the payment gateway icon. Please ensure that the icon is in PNG format, with dimensions of 200x200 pixels and a transparent background.
3. Click "Save".
{% endtab %}
{% endtabs %}
### 4) Editing Payment Gateway Icons
1. Default payment gateway icons cannot be edited.
2. You can only edit icons that you have created. To do so, follow these steps:
{% tabs %}
{% tab title="Step 1" %}
Find the icon you want to edit and click the "Edit" icon.
{% endtab %}
{% tab title="Step 2" %}
1. Update the name if needed.
2. If you wish to upload a new icon image, first click the "Delete" icon to remove the current icon. Then upload the new one.
3. Finally, click "Save" to apply your changes.
{% endtab %}
{% endtabs %}
### 5) Deleting Payment Gateway Icons
1. You cannot delete default payment gateway icons.
2. Additionally, icons currently in use by payment methods cannot be deleted. To delete an icon, follow these steps:
{% tabs %}
{% tab title="Step 1" %}
Find the icon you want to delete and click the "Delete" icon.
{% endtab %}
{% tab title="Step 2" %}
1. A popup confirmation notice will appear.
2. Once confirmed, the icon will be deleted.
{% endtab %}
{% endtabs %}
### 6) Assigning Icons to Payment Methods
1. You can assign payment gateway icons to different payment methods when creating or editing them.
2. Simply select the desired icon and save your changes accordingly.
3. Existing payment methods will have the Default Icon assigned by default.
### 7) Client Portal Deposit Page
The Client Portal Deposit page has undergone a complete overhaul, now consolidated into a single page. Your clients will be able to see the following:
1. Daily Deposit Time
2. Payment Methods
* Your clients will have access to view all available payment methods accepted, enabling them to select their preferred method.
* Additionally, for each payment method, the accepted currencies will be displayed.
* The selected payment method will be highlighted in your CRM's primary color.
3. Payment Currency
* After selecting their preferred payment method, your clients will have the option to choose their preferred currency.
* Similarly, the selected payment currency will be highlighted in your CRM's primary color.
4. Payment Details
* The displayed payment details will vary based on the selected payment method and your deposit configuration.
* Your clients will be required to complete the necessary fields and click "Deposit" once finished.
5. Mobile Optimized
* The redesigned deposit page has also been optimized for mobile devices.
## Direct Purchase of Prop Packages
You now have the option to offer clients the ability to directly purchase prop packages, eliminating the need for them to deposit funds into their account first.
### 1) Setting Up Direct Purchase
To set up direct purchase as a payment method for your prop packages, follow these steps:
{% tabs %}
{% tab title="Step 1" %}
1. Go to Prop Trading > Challenge Settings.
2. Find the challenge you want to update the payment method for and click the "Settings" icon.
{% endtab %}
{% tab title="Step 2" %}
1. Locate the package you want to modify and click the "Edit" icon.
2. Go to "Package Rule."
3. Choose "Purchase Package Directly" to enable it as a payment method for prop traders.
4. You'll also need to select the acceptable payment methods for direct purchase.
5. Save your changes.
{% endtab %}
{% endtabs %}
### 2) Client Portal Direct Purchase
When your clients register for a prop package, they will be redirected to the deposit page. There, they can view the following:
1. Participation Fee
2. Available Payment Methods
3. Accepted Payment Currencies
4. Required Payment Details
Once the client has filled in the necessary information, they will need to click "Complete Payment."
If you have enabled "Deduct from Account" as a payment method, your clients will be able to view their wallet and trading accounts under the payment methods. They can simply click on the account they wish to deduct the registration fee from and click "Complete Payment."
### 3) Prop Trading Participation Requests
When reviewing prop trading participation requests, you can now see the fee type selected by your clients: "Purchase Package Directly" or "Deduct from Account." For online payment methods such as PayPal, you will also see the payment status.